Running stitch
- Hope
- Apr 19, 2021
- 2 min read
Running stitch is such a super easy and essential stitch that I always forget it’s something new stitchers might need help learning!

I've provided step-by-step instructions in this post. In the video tutorial at the bottom of this page (feel free to scroll down!), I stitch a simple straight line to show you this stitch’s basic steps; a curved line to show you the stitch in action; and how to use running stitch to finish off your hoop!
Step 1: Draw your guidelines (or pattern) onto fabric.
For this example, I used a heat-erasable transfer pen, but you can use any sort of transfer method you like!

Step 2: Thread your needle.
For this example, I'm using all six strands of cotton embroidery floss, with a knot at the end of my floss to prevent it from coming through the hoop. You can use any number of strands you like, depending on your desired effect.

Step 3: Make a single straight stitch.
You can make this stitch as long or short as you like. In general, you'll want to keep this stitch length consistent as you stitch your line; that said, you can always change up the length for different effects. If you're following a curve (as I do in the video tutorial below), keep in mind that shorter stitches more easily follow tighter curves.


Step 4: Bring your needle back up through your fabric and make a second straight stitch, leaving a gap in between your stitches.
In the example below, I've left a gap that is roughly the same length as my stitches; again, do whatever works best for you!


Step 5: Continue stitching until you're done with your line of running stitches.
It's exactly that easy!

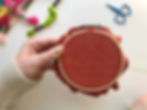
With running stitch, the back of your hoop will look very similar to the front.

As I mentioned above, you can choose any stitch length you like to achieve different results.

Running stitch video tutorial!
Running stitch can be used to follow a straight line, to stitch a curve, and even to close up a finished embroidery project. I demonstrate those in the video below.


