Cloud filling stitch
- Hope
- Jul 16, 2021
- 2 min read
Cloud filling stitch is an open fill technique popularized in crewel work that can be used to fill a space in hand embroidery. I love this stitch, but I'll be honest: I think it's easier to execute by modifying it just a bit!
I think of this stitch as a combination of back stitching, cross stitching, and couching. In this post, I'll take you through modified cloud filling stitch with step-by-step photo and written instructions, as well as a video tutorial (feel free to jump ahead if videos are easier for you to follow!).

Modified cloud filling stitch is an open fill technique; you can use it to fill a space just like you'd use a solid (aka "closed") fill technique, such as satin stitch, brick stitch, or basket filling stitch. The difference between an open fill technique and a solid fill technique is that with an open fill, such as cloud filling stitch, you'll be able to see the fabric underneath the stitches, whereas with a closed fill, you won't.
I've used this stitch to fill in leaf-shaped areas (for example, in the April 2021 Hopebroidery Box project, where we stitched a monstera plant); you can really use this stitch to fill in any shape or design you like! In today's tutorial, I stitch a simple rectangle to demonstrate this stitch - but really, the possibilities are endless!
Step 1: Gather your supplies and draw your design.
In this tutorial, I'm stitching on two layers of cotton fabric and I'll be stitching with all six strands of cotton embroidery floss. I've drawn a rectangle on my fabric using a heat-erasable fabric pen.

Step 2: Stitch long straight stitches across your shape, trying to keep them as evenly spaced out as possible.
I've started by going from one corner to another, but you don't need corners on your shape to do this - just choose a random spot on one side of your shape and bring your needle back down on the other.


I like to start in the middle and work my way out toward the edges of my shape, filling in the gaps after I've placed a few guideline stitches. If you want to make these super even and more perfectly spaced, you can draw these lines out for yourself before you start stitching.


Step 3: Once you've finished stitching in one direction, repeat in the opposite direction.
This step essentially creates giant cross stitches on your shape. If you want to create actual cross stitches to stitch your base, rather than doing these giant fake cross stitches, that's totally fine! But I can't really tell a difference when I do that (vs. what I'm doing here), and what I'm doing here is much faster!


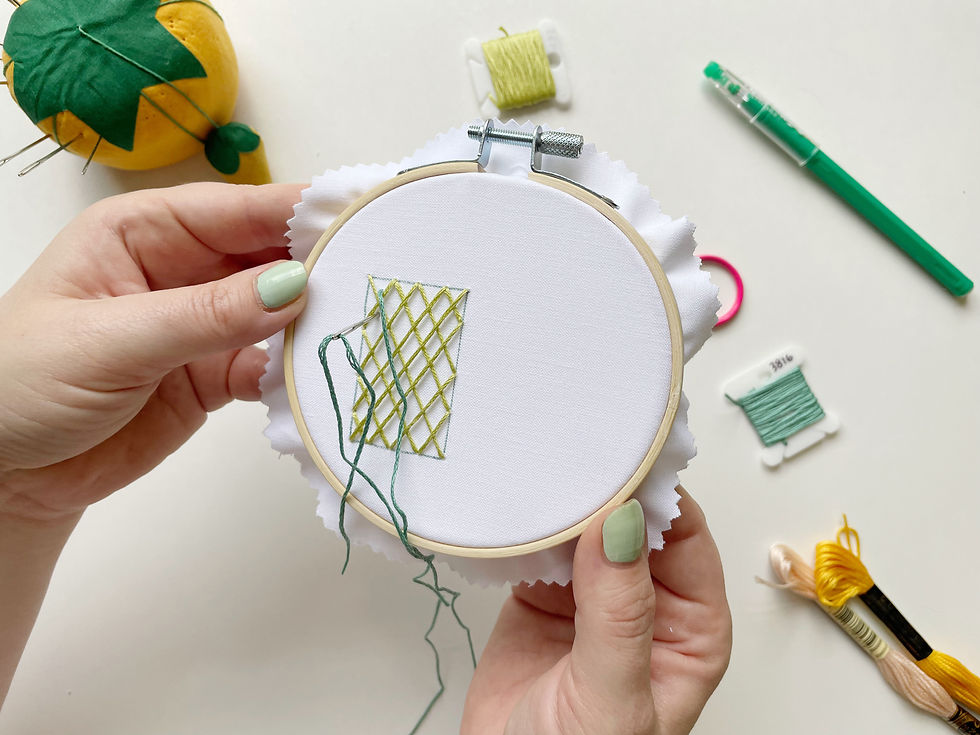
Step 4: Once your base is stitched, "couch" your base stitches down wherever they cross.
I'm using a different color of floss to couch my stitches here because I think it's easier to follow, but you can use the same color here if you like.


Here's what finished modified cloud filling stitch might look like when you're done!

Video tutorial for modified cloud filling stitch
I hope this was helpful! If you're new to embroidery and prefer to learn with a kit, I have loads of kits available in my shop; if you're already a stitcher, check out my supplies shop!


Commentaires